Custom Robots Header Tags is very important for SEO part in your Blogger Blog Website. It is called On Page SEO. It helps your website for gather more visitors and robots setting, page ranking and search engine results. This also helps for page index in Google. Now we can see how to do it.
Recommended: How to add Custom Robots Txt in Blogger Blog
Setting Custom Robots Header Tags
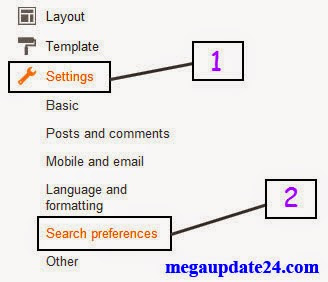
1 . Firstly Log in your account Then from Dashboard to Setting > Search preference > Custom Robots Header Tags> Edit then click yes.
2 . Now click all then noodp from home page.
3 .This step click noindex and noodp from Archive and search page.
4 . Now from Default for post and page click All and noodp.
5 . Now click “save change”.
6 . Now your setting is done.
This is the way of Custom Robots Header Tags setting. Custom Robots Txt is also important for your website. Hopefully, you can do it successfully by following my tutorial.
If face any problem must be informed via the comment I will try to solve it and don’t forget to share on Facebook, Twitter and Google+ if you like it.


